
Disneyland Haunted Mansion 50th Anniversary Tribute Art
Disneyland Haunted Mansion 50th Anniversary Tribute Art by Patrick Scullin
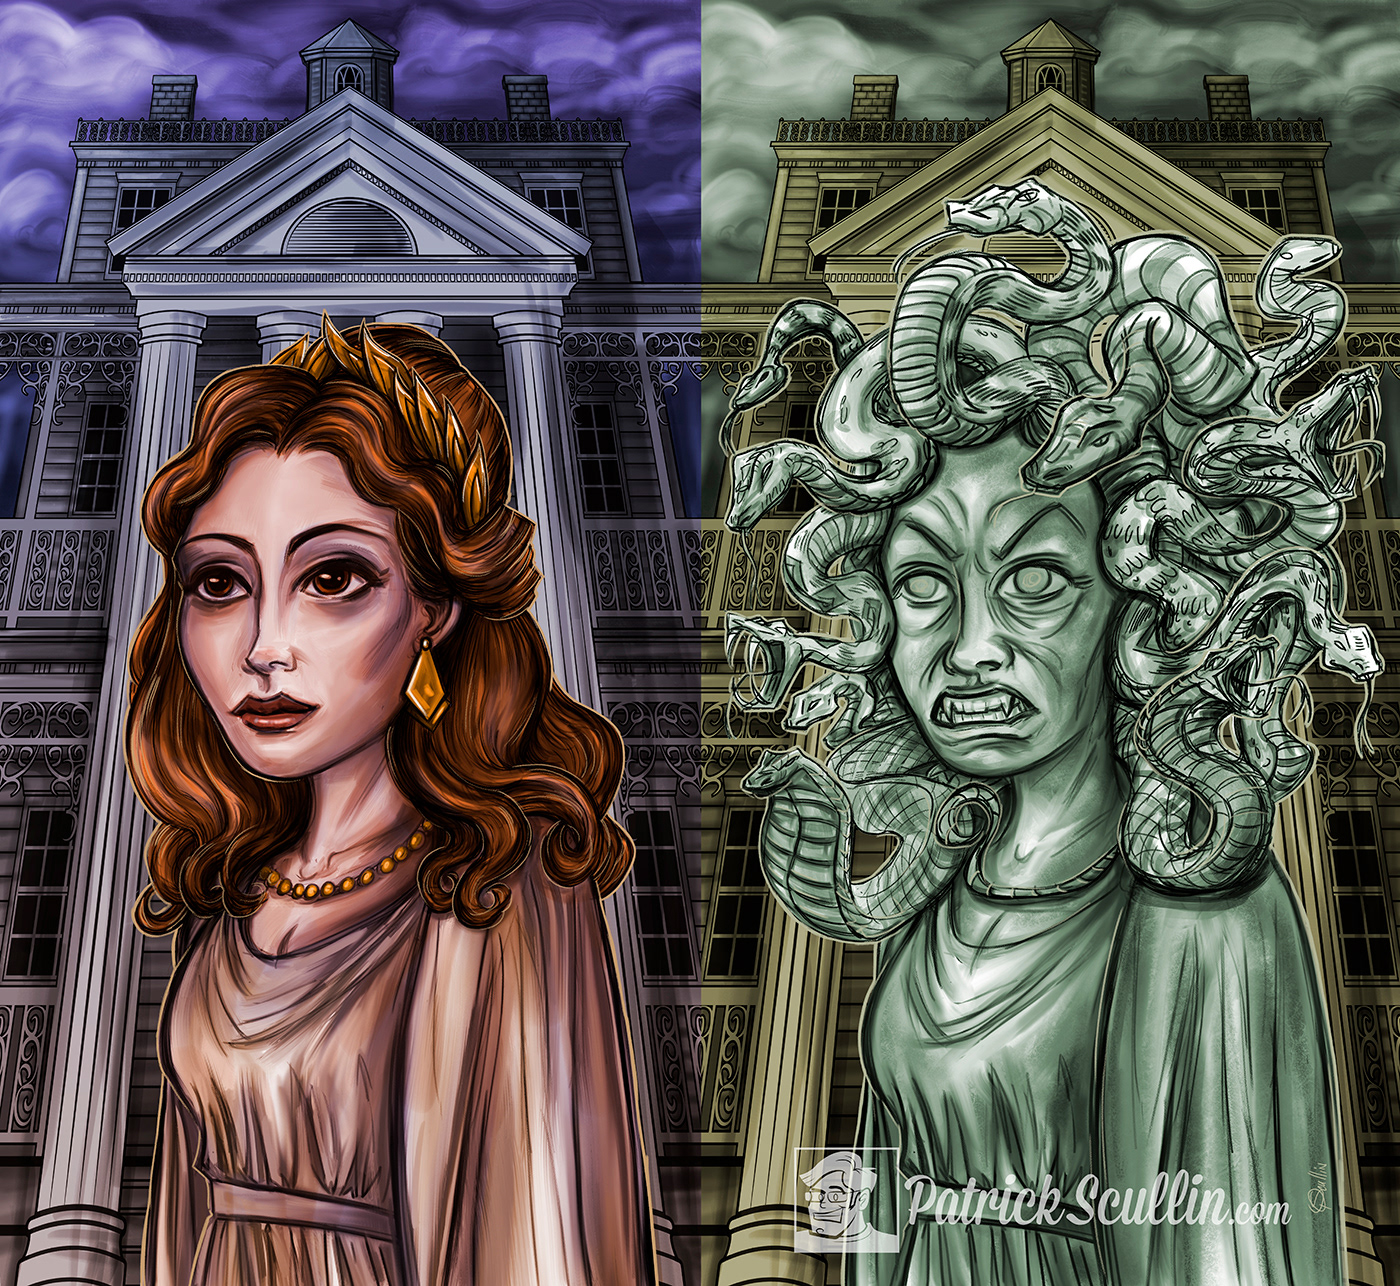
One of my favorite parts of the Haunted Mansion ride has always been the portrait gallery. These portraits were originally painted by legendary Disney Imagineer Marc Davis. As the 50th Anniversary of this classic ride approached I wanted to make my own version of the changing portrait with a twist. After researching some methods for creating 3-dimensional paintings or lenticular prints I settled on my own method for constructing a mounted portrait that would change images as you walked by. I decided this hand-made process would be a satisfactory homage to the original art. What follows is a part of the process I used to complete the project. The finished piece is now mounted to my studio wall.
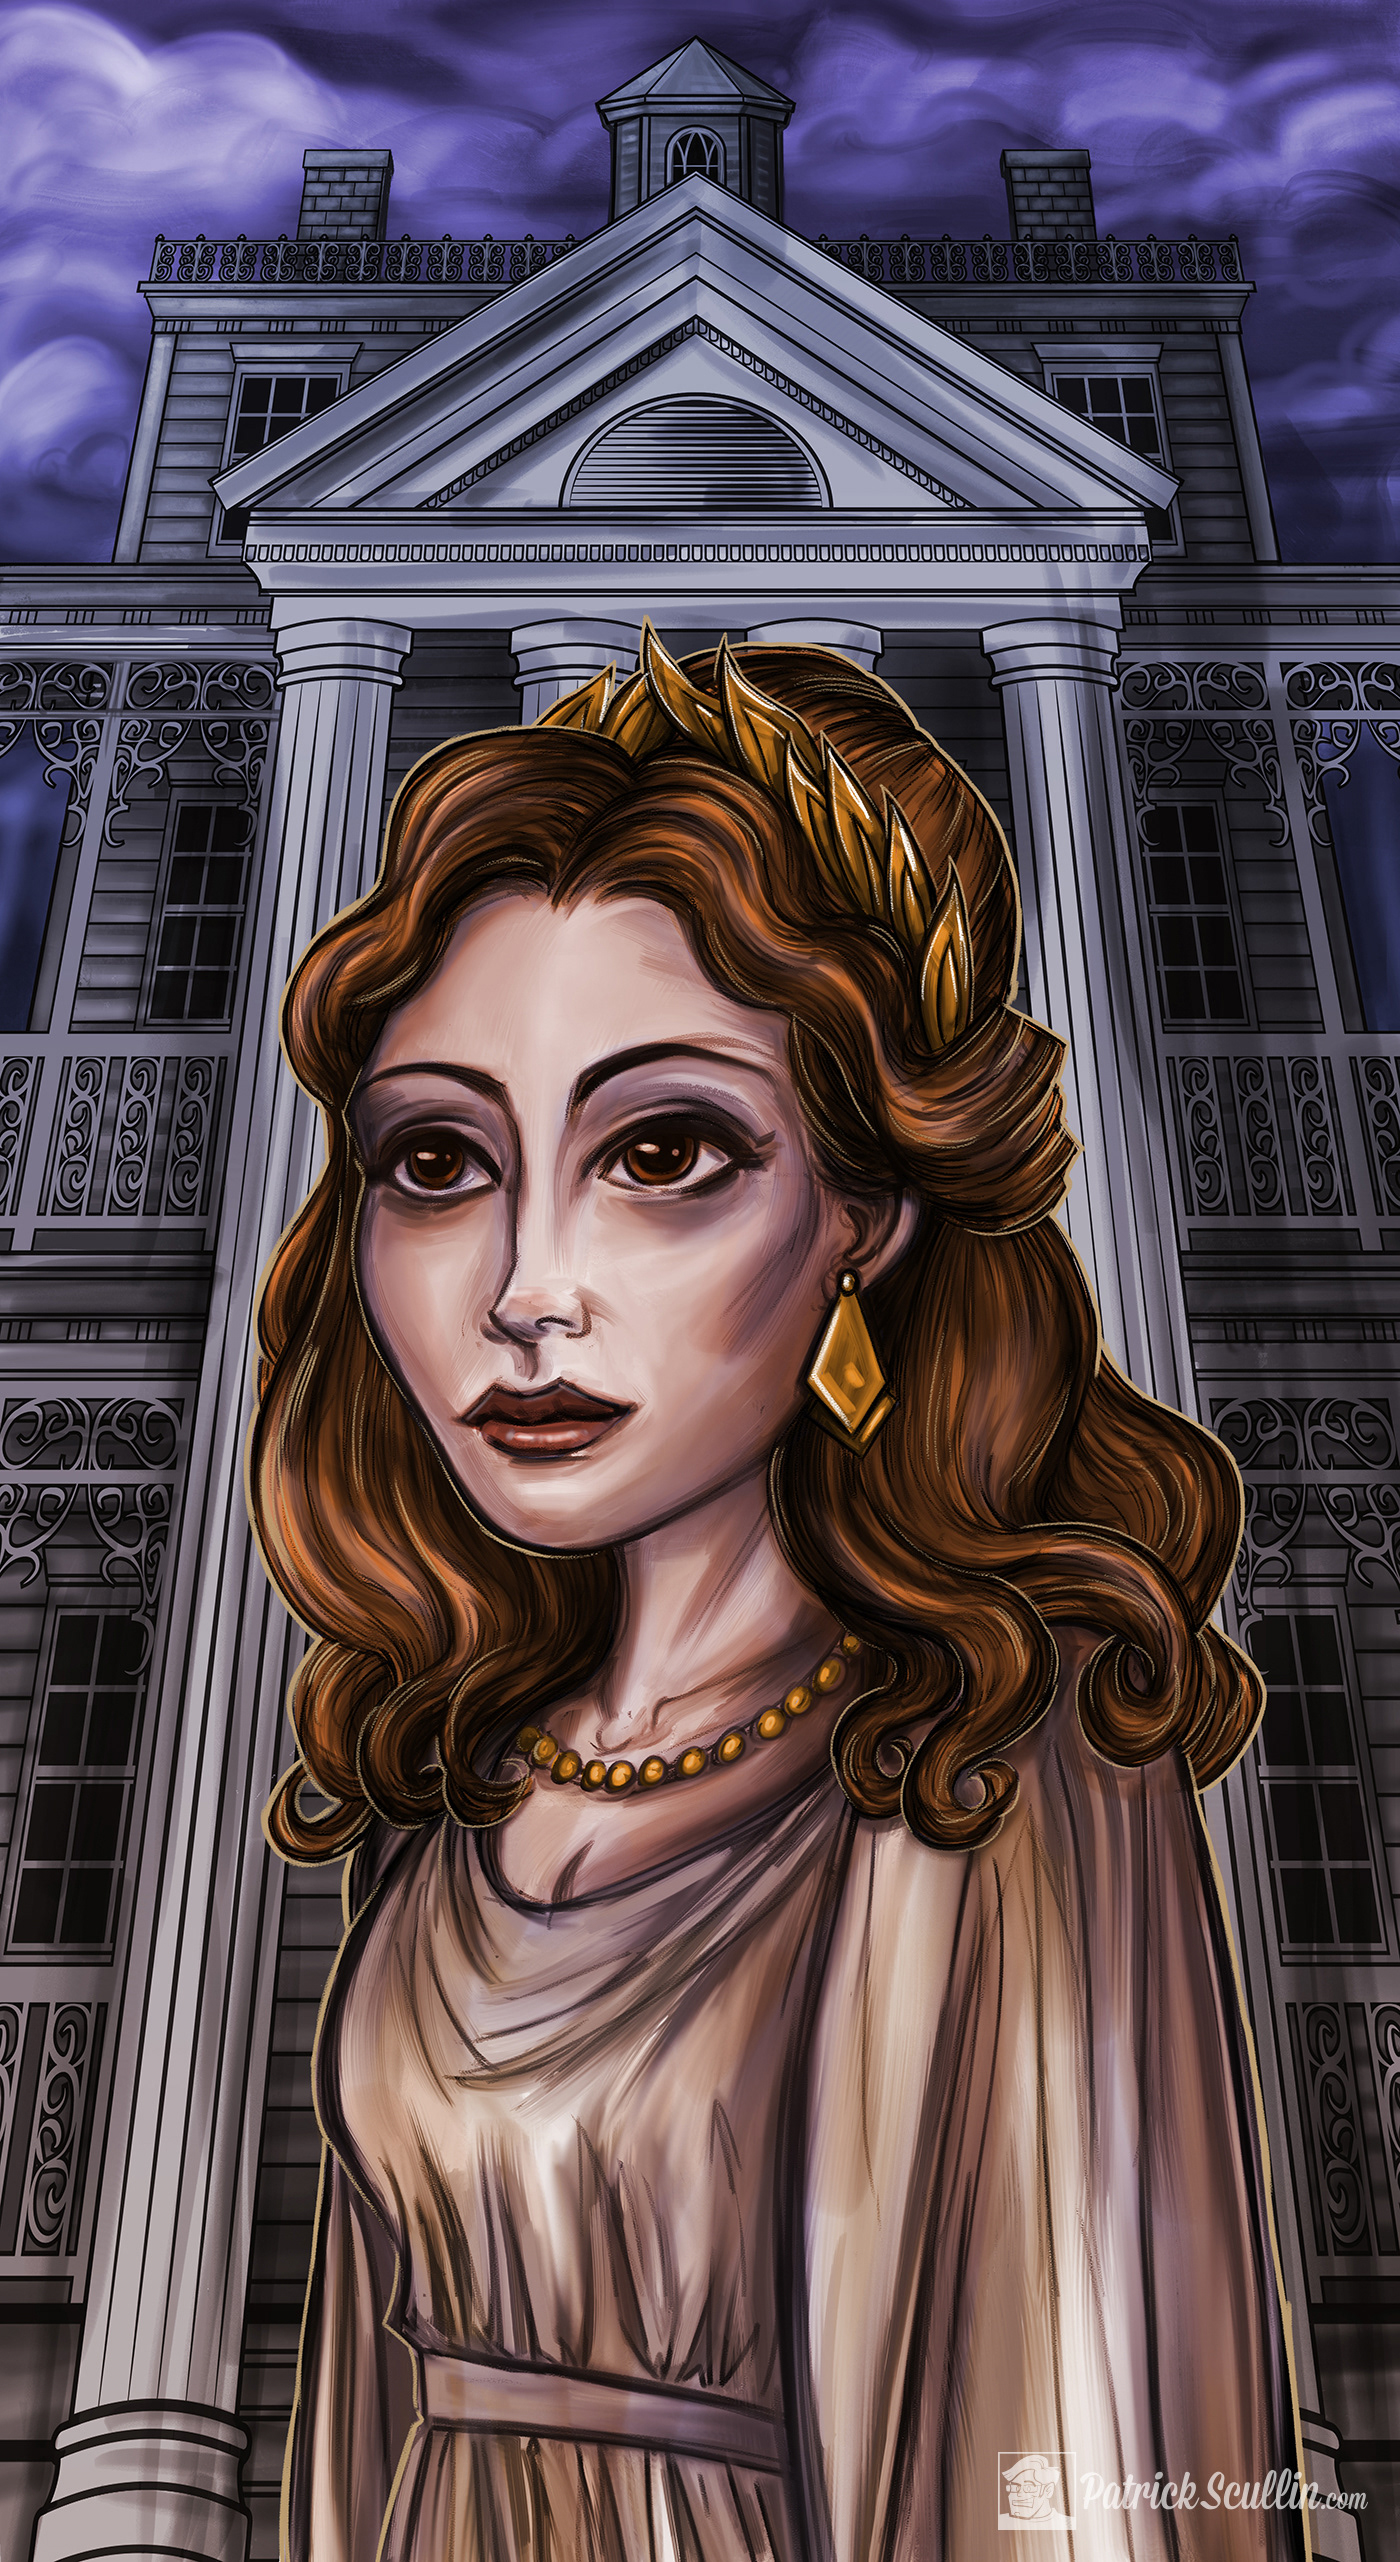
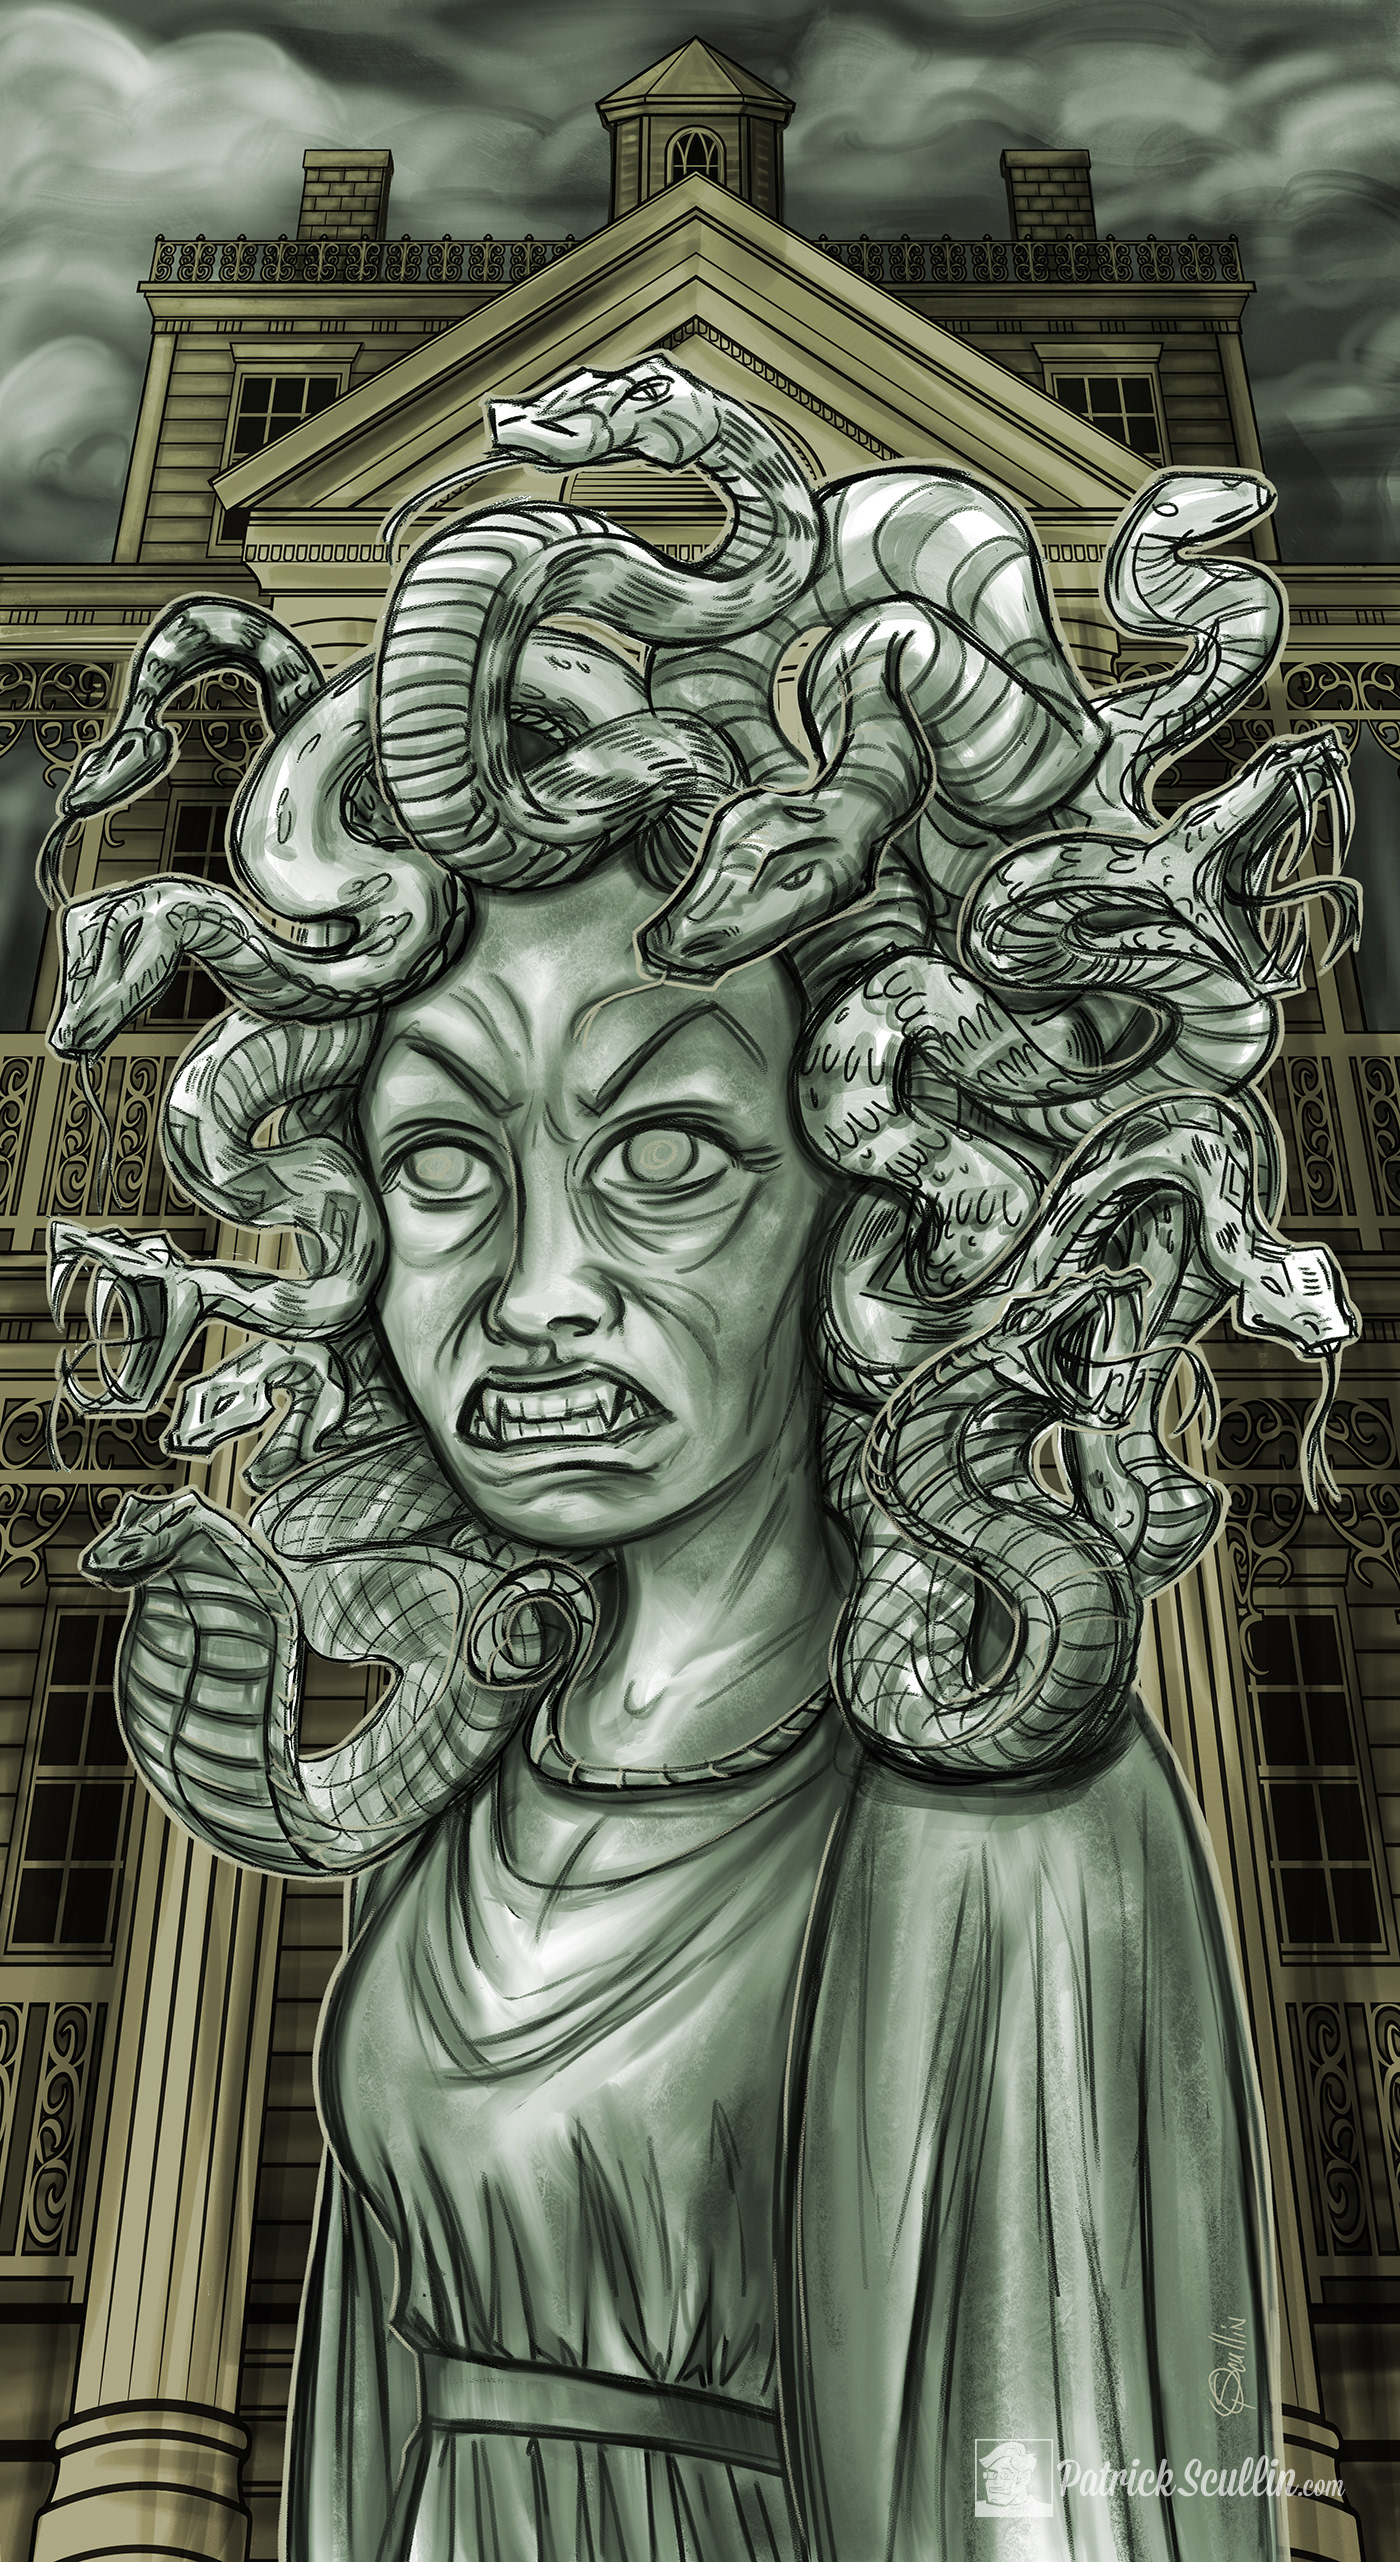
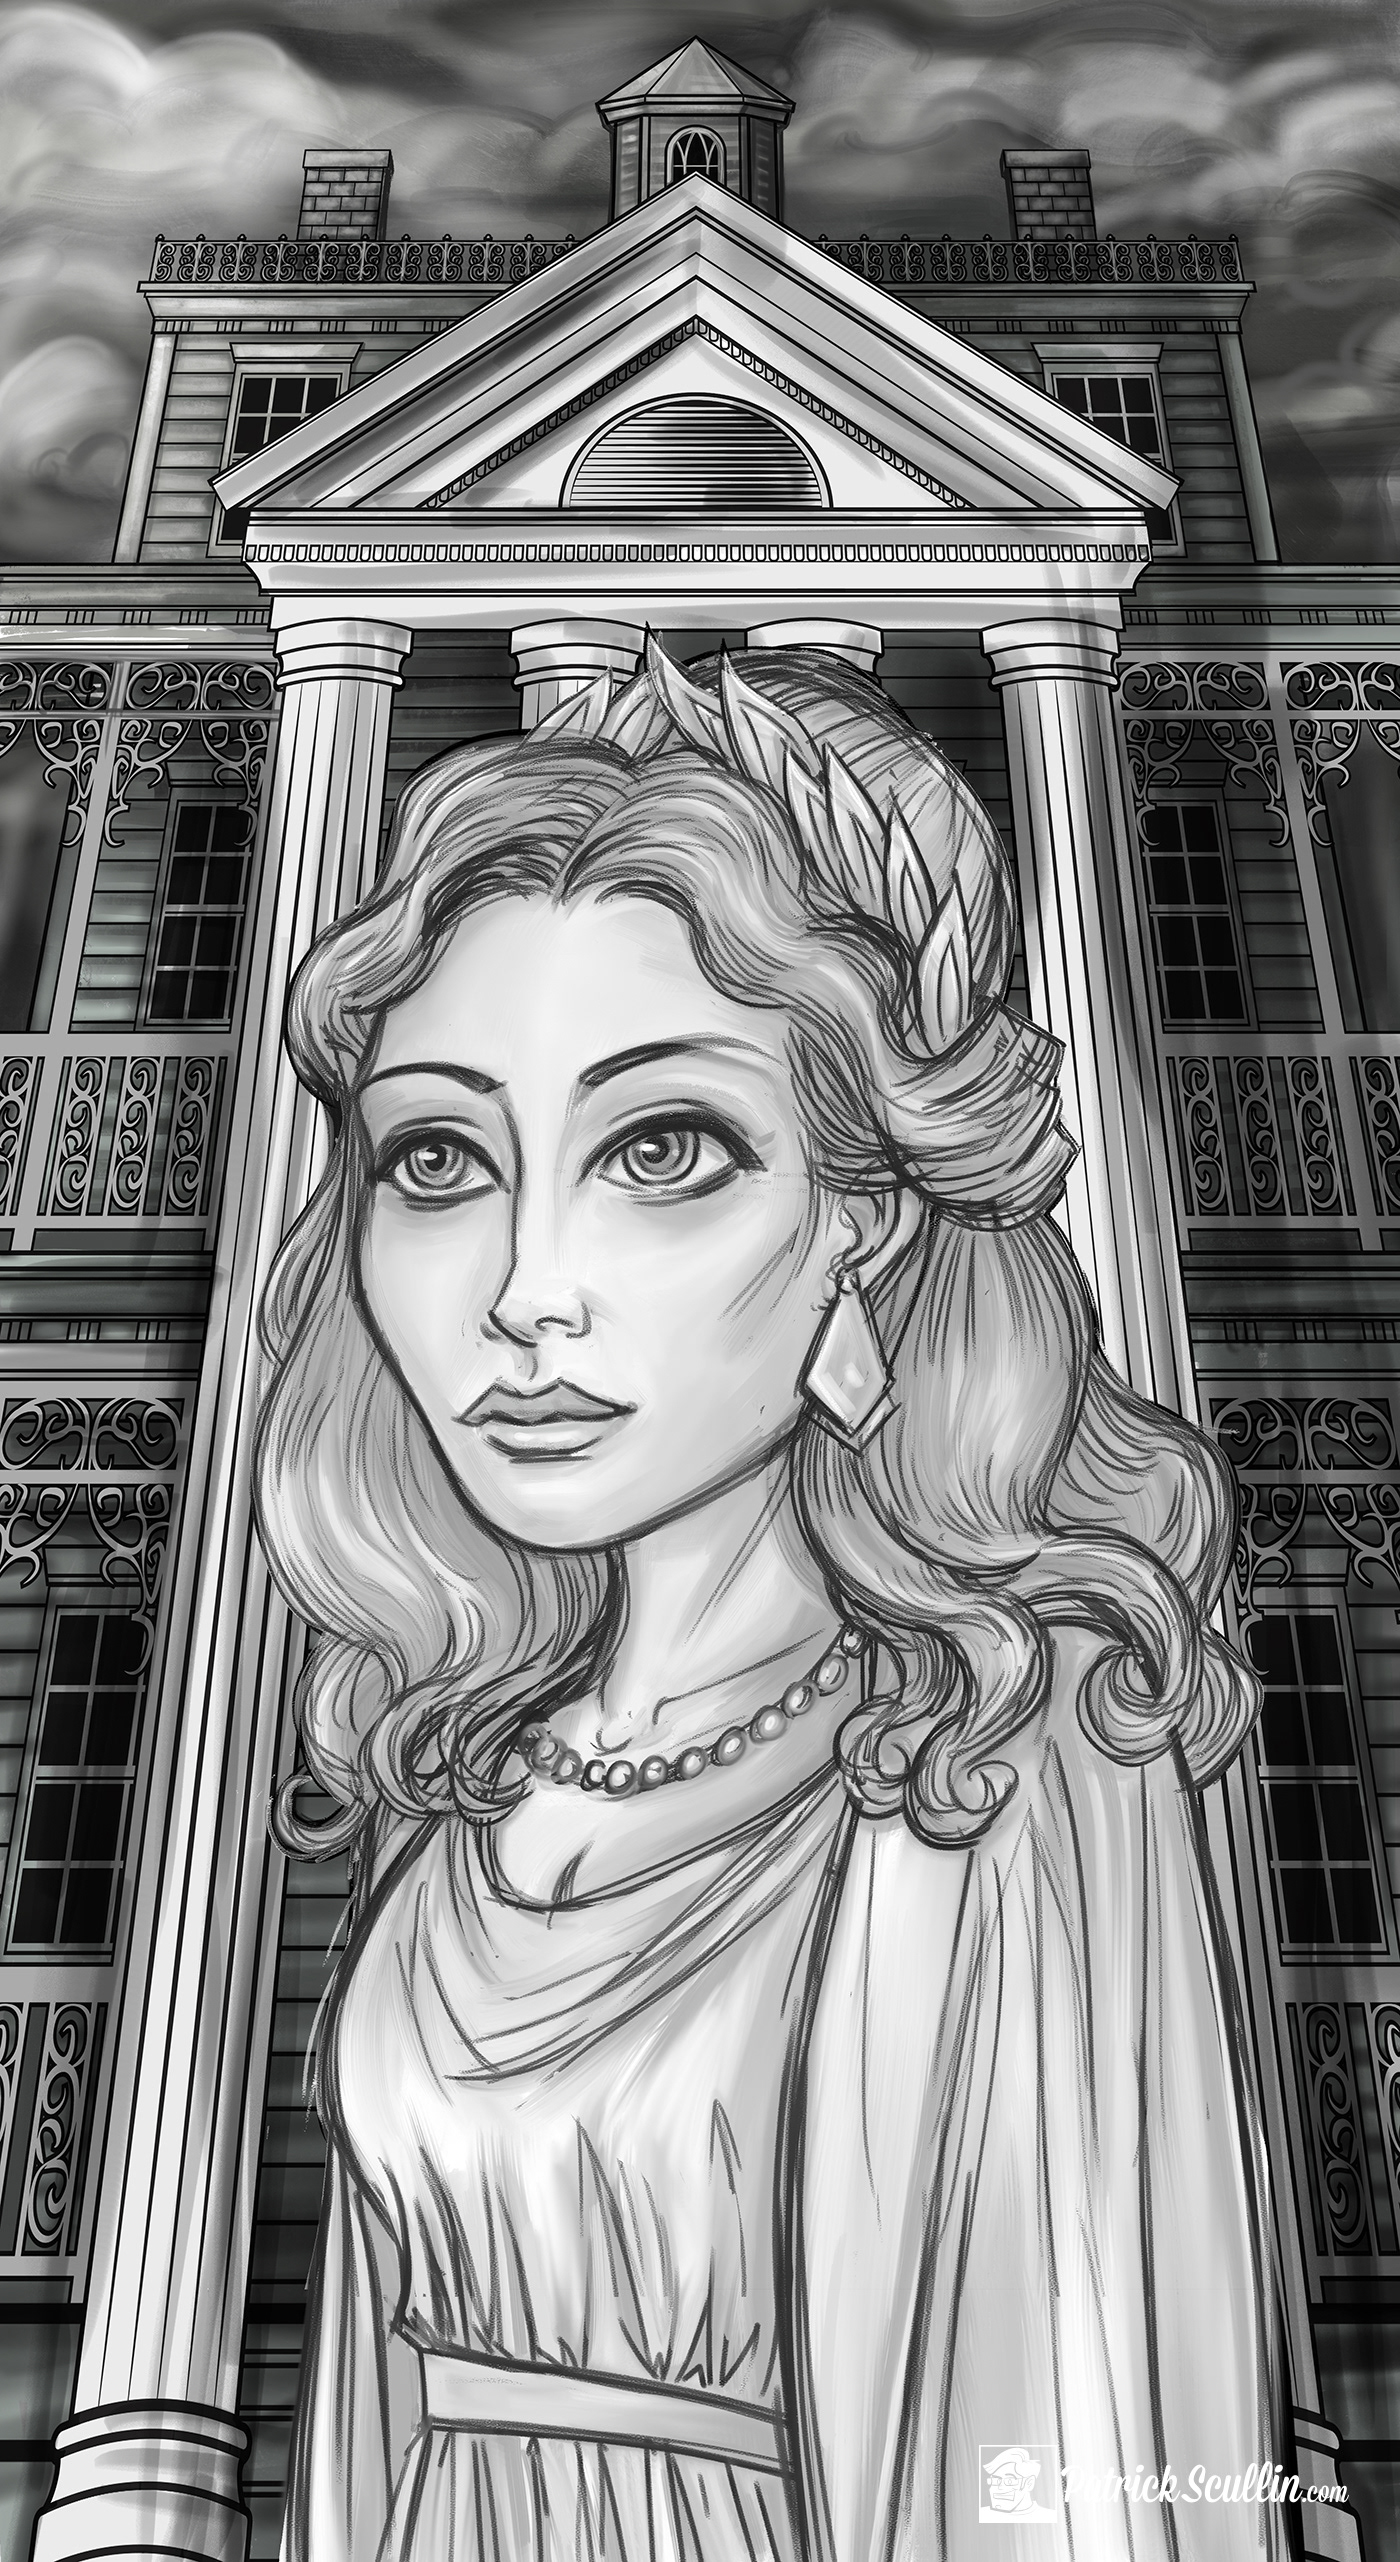

As I designed the portrait I realized it was necessary to be careful with my measurements or else I would not be able to mount the art into an 18"x24" frame. I couldn't compute the math on my own so I enlisted my teenage son to figure out the geometry necessary to make an equilateral triangle so we could calculate the surface area of one side of the image. Simply put I needed two paintings the exact same width and height. I decided to create three separate paintings the background, Medusa and the Gorgon.
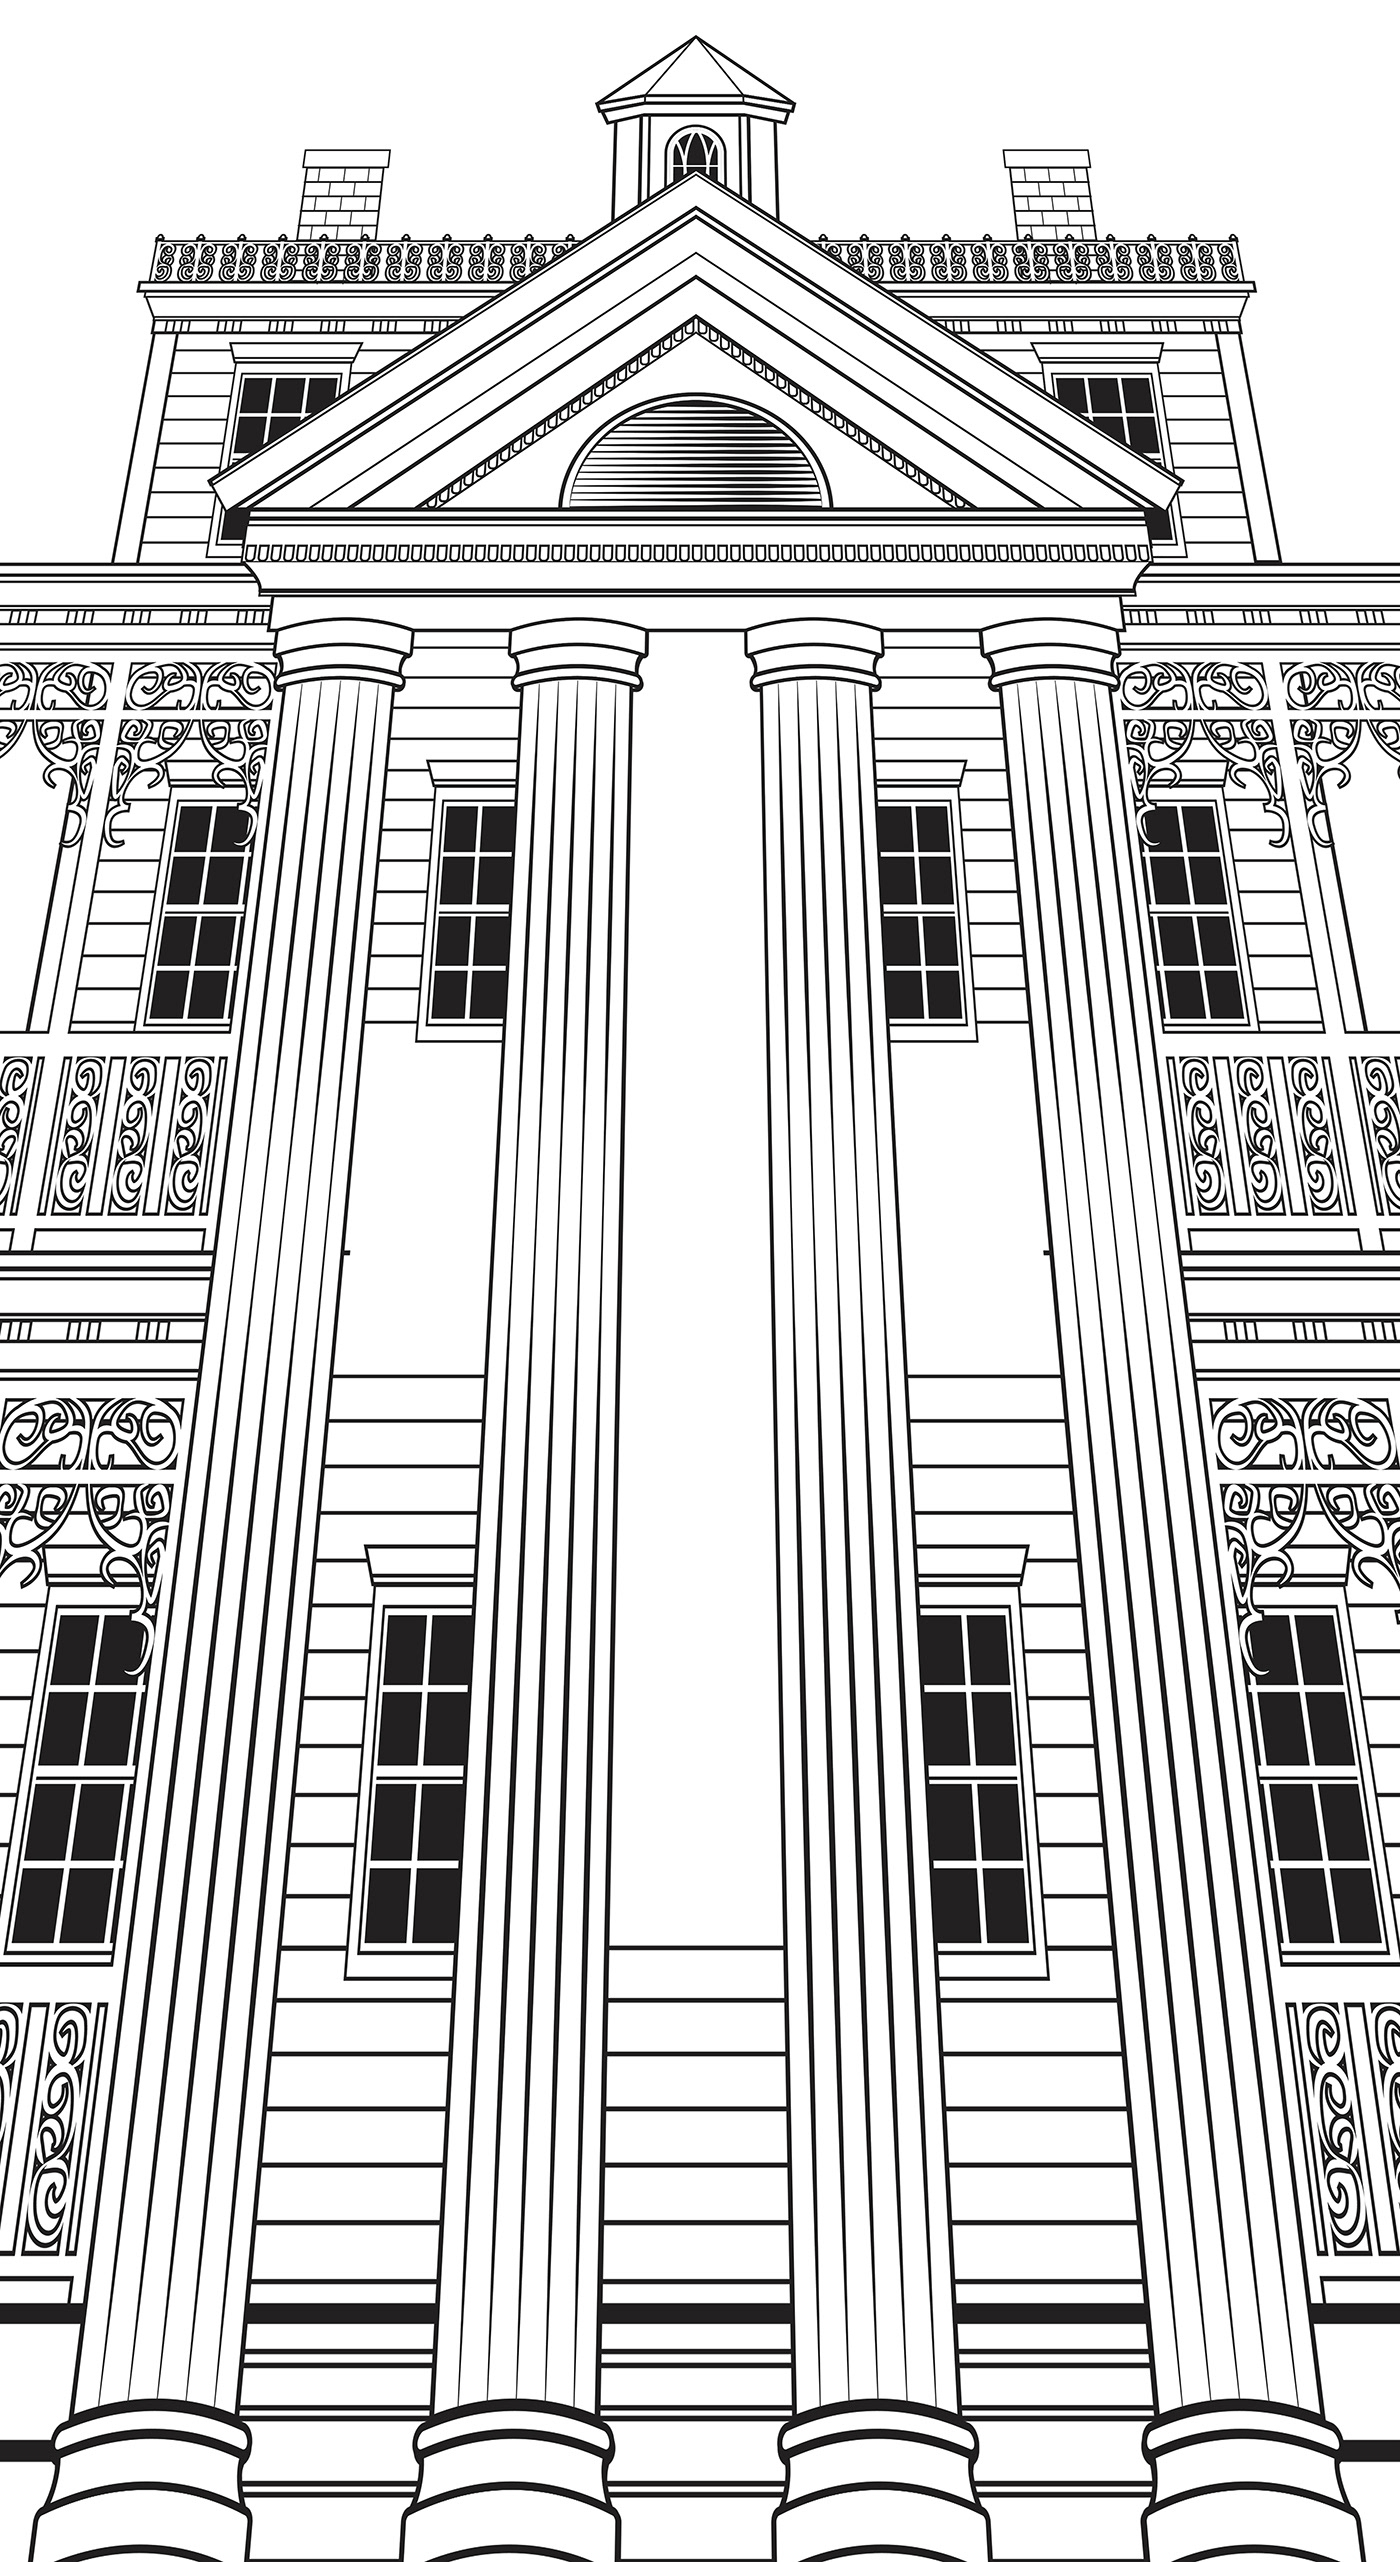
The original background of the Medusa painting was a greek temple. As a tribute to the Haunted Mansion I thought it would be nice to put the mansion itself in the background and use the columns of the staircase to frame Medusa. This worked very well but I did have to compromise by stretching the mansion a bit because it would not fit into my narrow format. I figured that was appropriate considering the "stretching" that goes on in the ride itself.
I used Illustrator to draw the Mansion in vector art. This made it easier to copy and reuse portions of the drawing. It also came in handy while stretching and formatting the mansion to fit the painting. Medusa and the Gorgon were sketched first in Procreate and then painted and colored in Photoshop.
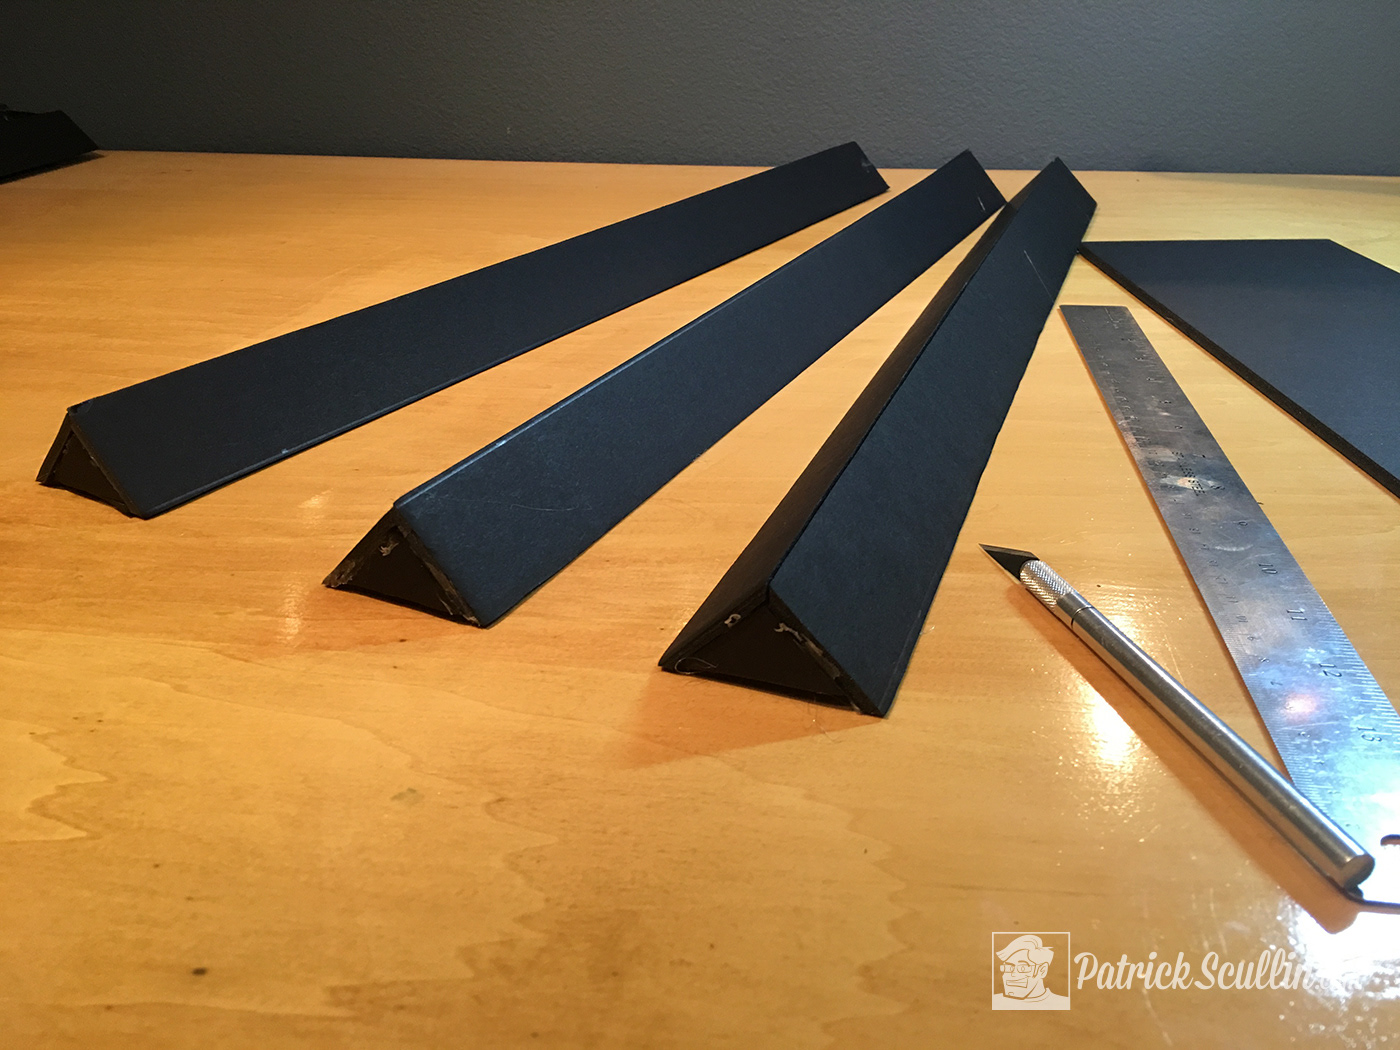
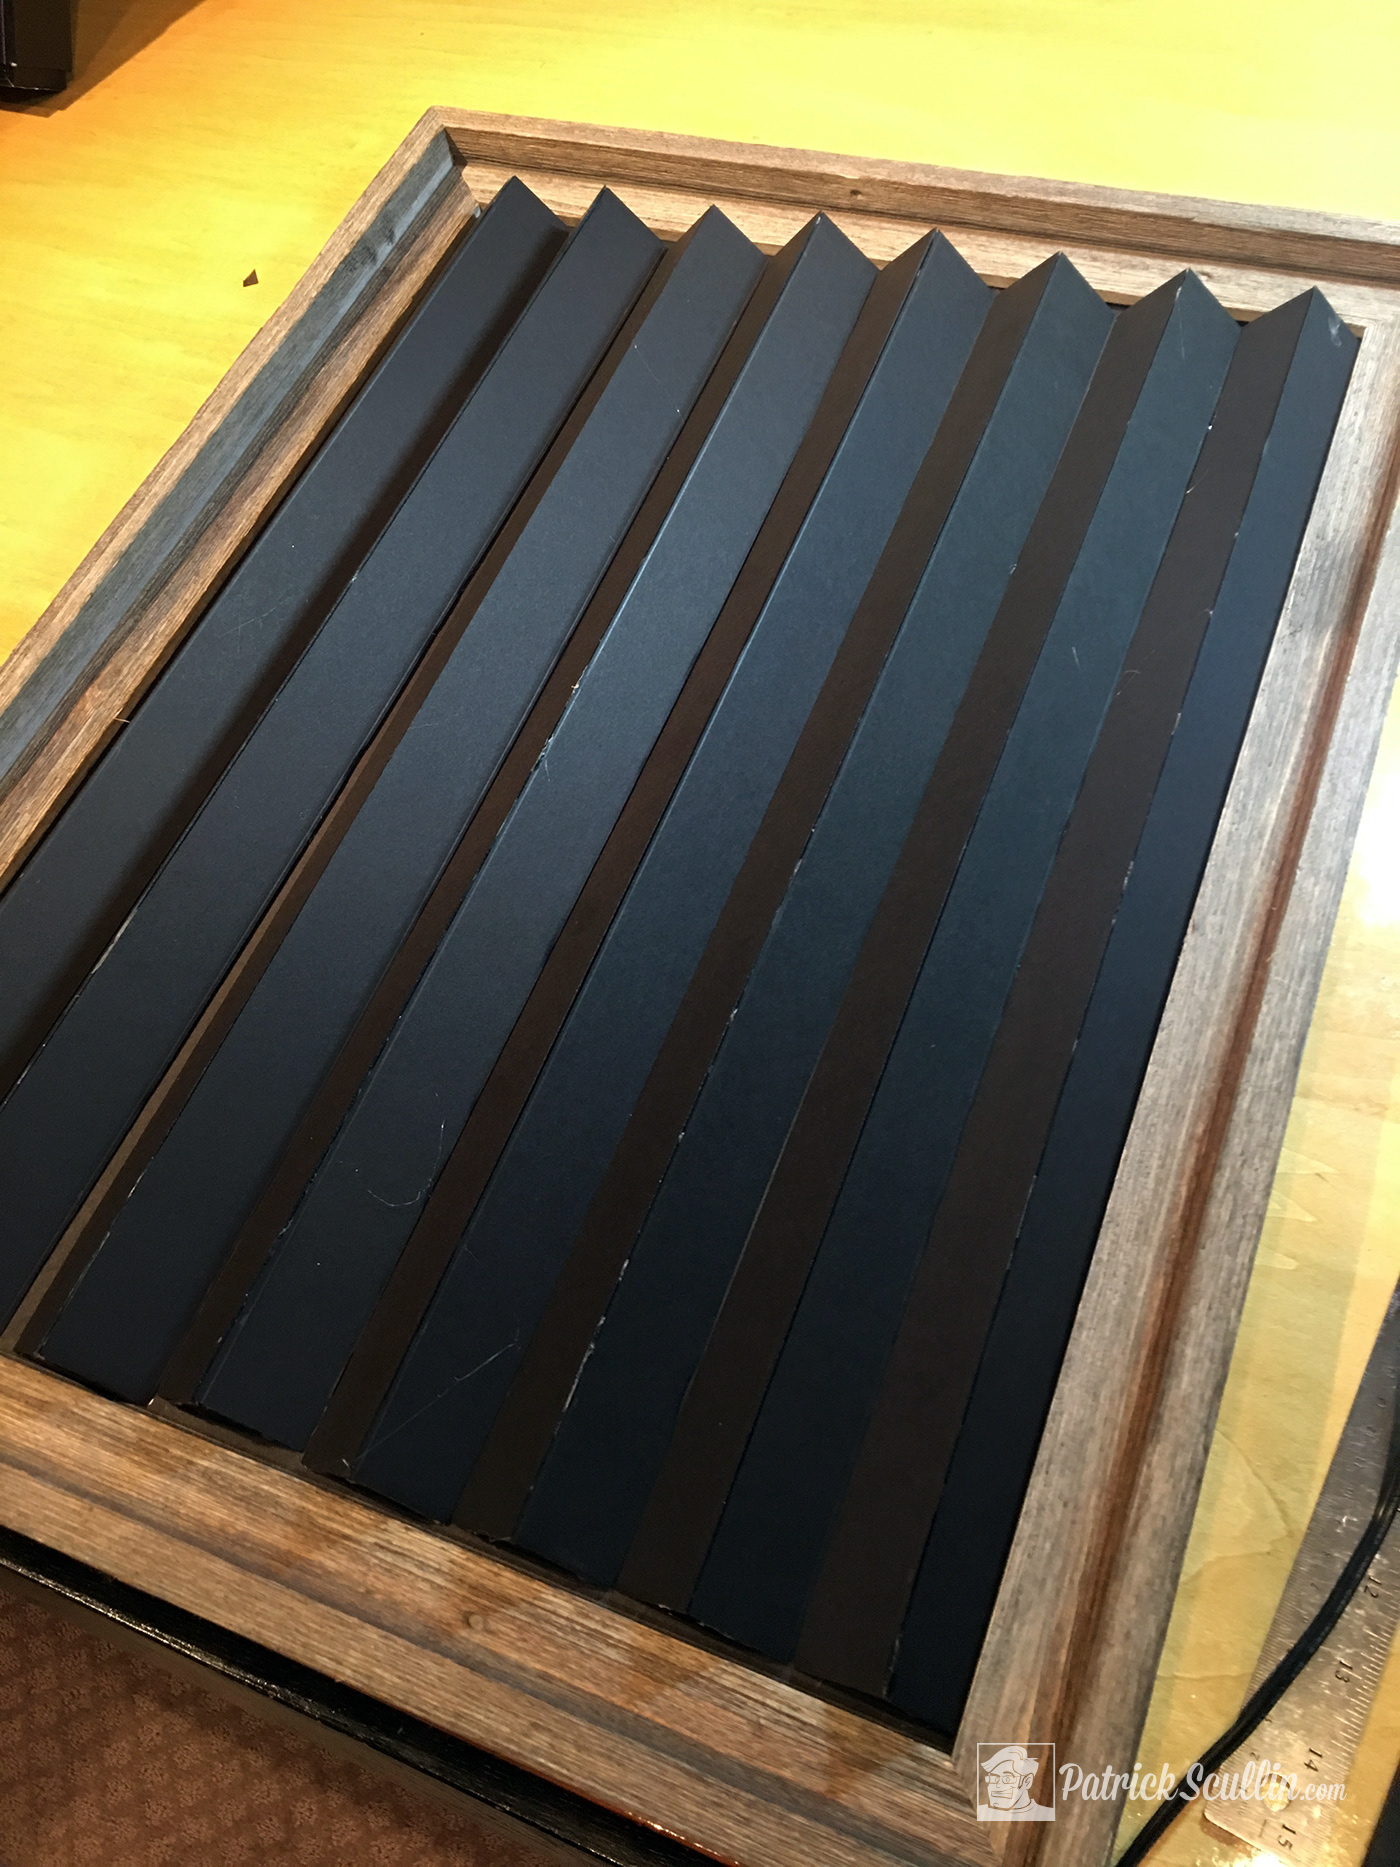
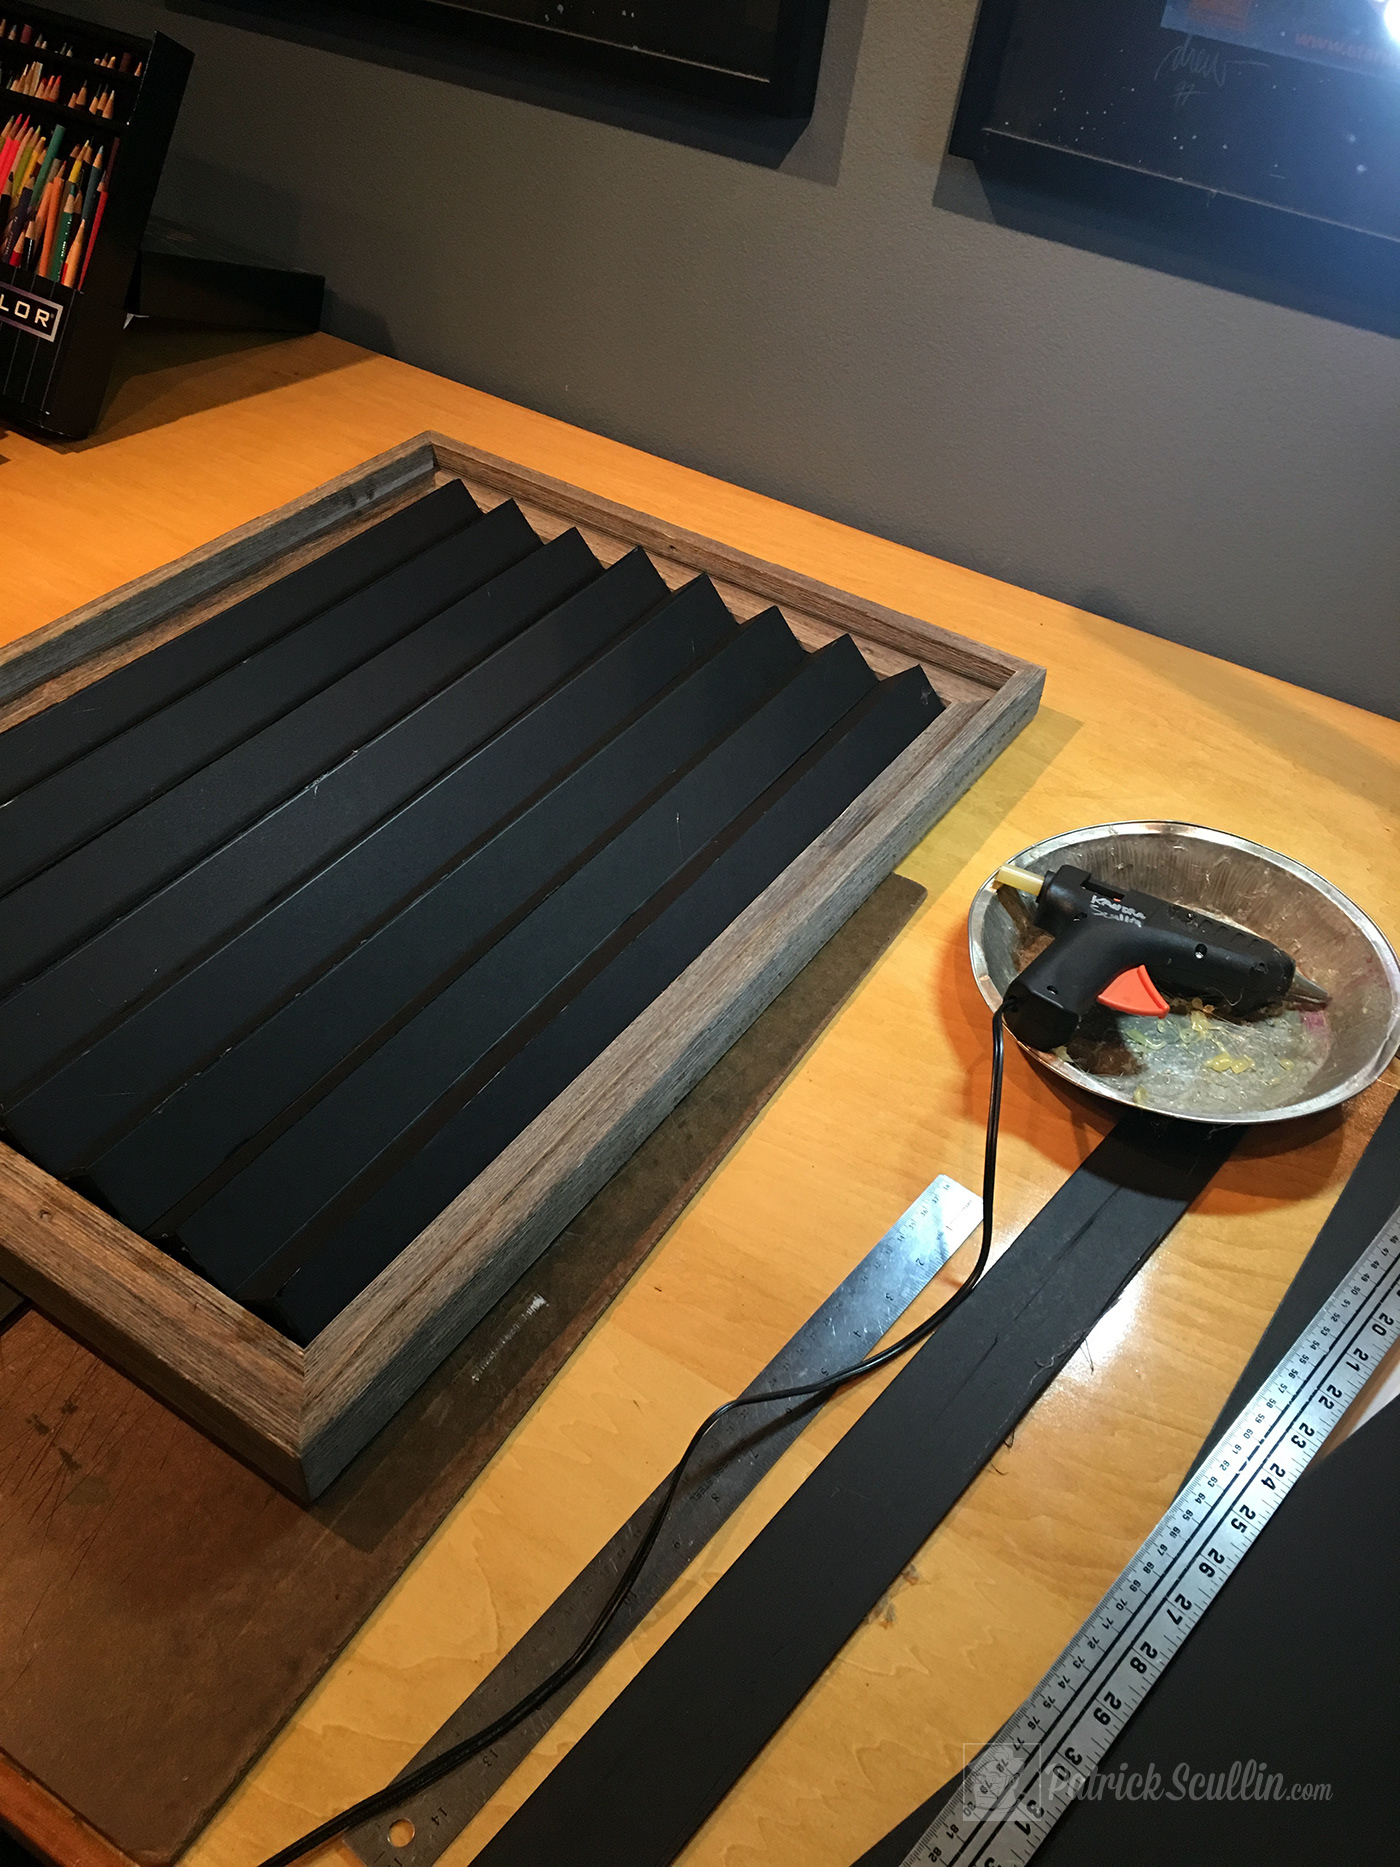
The most difficult part of the process was the actual construction of the triangles necessary to build the 3-D panels. I settled on foam core as a construction material because it would be rigid and lightweight making it easier to attach to the frame. As a designer I have had a lot of experience crafting mock-ups and this became a fun x-acto knife project. Ultimately I would need eight equilateral triangles 1.35" wide and 24" tall to fit side by side in my 18"x24" frame. This means I cut 32 identical strips of foam core. I also notched all the edges so I could hot glue and spray mount them together.
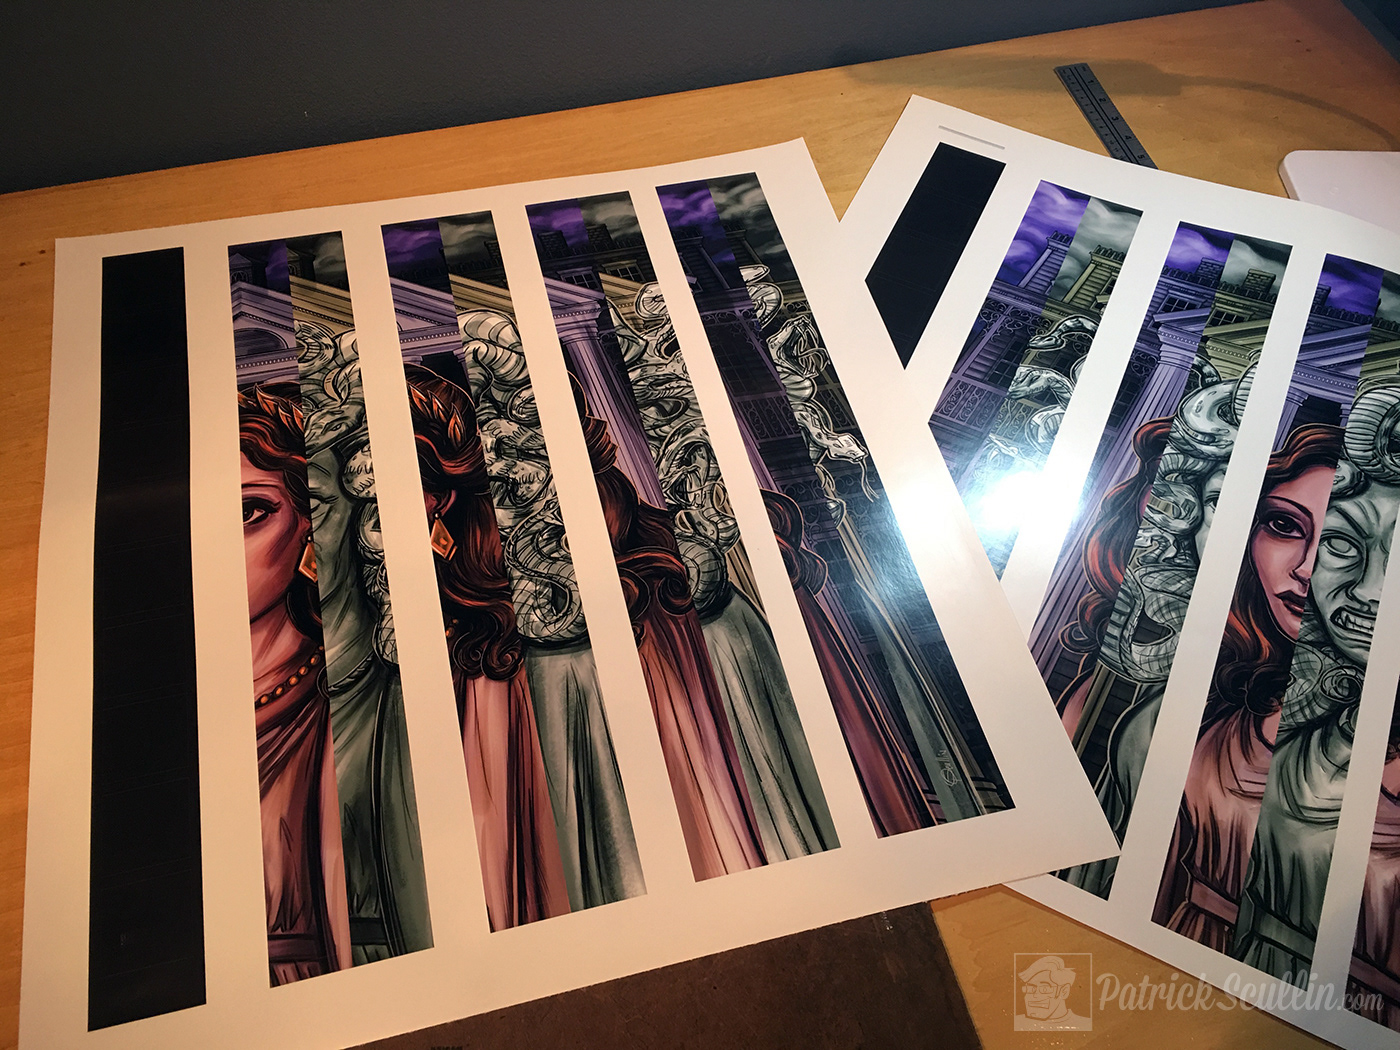
The best method I came up with for mounting the image onto the foam core was to print the images separately on adhesive vinyl. This allowed me to cut the image into the corresponding strips and attach them to the correct side of the foam core triangles. This required a steady hand and an attention to detail to make sure each side fit correctly. In the end I am very satisfied with the effect. I debuted the art at San Diego Comic Con where it became a fun conversation piece.